


Summary of CIDG
- What is nature stone?
Natural Stone is a variety of earth-mined goods that have been utilized for thousands of years as building materials and ornamental accents are referred to as “natural stone.” These goods include , Onyx, Granite, Marble, Limestone, Travertine, Slate, Quartzite, sandstone and others. Natural stone is hand-selected from the best, most reliable sources for strength and beauty; it is more than just rocks. Even among pieces from the same source, natural stone items have different compositions, shades of color, and textures. This is typically viewed as a perk because it allows for unique designs and dramatic, eye-catching uses.
- What are the different kinds of natural stone?
- Granite natural stone
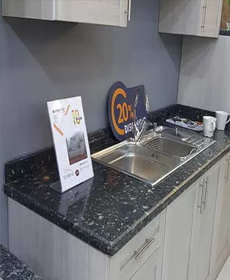
Granite is unequalled for elegance and durability that require little maintenance. Granite is the ideal material for use in large-scale structural projects like walls, monuments, and supports due to its extraordinary strength and density. Despite being the strongest construction stone, it also has ornamental appeal due to the incredible range of mineral-rich colors and natural patterns. Products made of granite are excellent for use as external decorative applications, vanities, countertops, and flooring.
- Marble natural stone
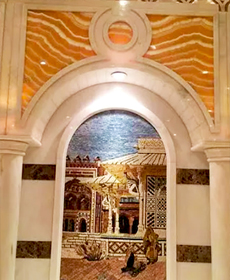
Marble may be used anywhere in the house and is admired for its classic design, texture, and high-gloss polish in addition to a wide range of exquisite hues. Marble is one of the most adaptable decorative stones since it comes in solid or strikingly veined variations and can be carved or sculpted in many different ways. Modern technology makes exquisite marble items accessible to even the most frugal homeowners. Marble is frequently seen as a symbol of luxury.
- Quartz
Quartz is a rock akin to slate with a medium grained texture and amazing resilience that shimmers and sparkles with tiny quartz crystals. Different mineral contents provide a wide range of colors, from subdued white, grey, or beige to daring tones of purple and pink. Quartzite is frequently utilized in ornamental tiles and wall veneers. It is the ideal choice for flooring both inside and outside, including in locations with high traffic and exposure to the elements, due to its naturally non-skid texture.
- Sandstone natural stone
It is simple to understand why sandstone products have been used for walls, floors, and pavers for thousands of years thanks to its homogeneous texture, attractive diversity of hues and finishes, and weather resistant sturdiness. There is sandstone to fit any décor, and variances in it, like in other forms of rock, are caused by differences in the mineral makeup.
Modern casual and easy lifestyles are ideal for the subdued, gentle tones of limestone. Products made of limestone are great for baths, fireplaces, countertops, and flooring in low-traffic, informal settings. They come in gentle beige and tan tones and can be polished or honed.
- Specification of natural stone
- Density: Density simply refers to the weight of a stone and is measured relative to the density of water. A dense stone will offer superior durability and strength.
- Porosity: Porosity is the amount of open space between mineral grains in a stone, that may remain unfilled or be factory-filled with resin or cement. Basalt tiles Egypt will stain when exposed to oil and highly-pigmented liquids.
- Permeability: Permeability is the ability of liquids to move through a stone. While permeability is closely linked to porosity, a stone can have low porosity and high permeability depending on its grain structure.
- Absorption: This is a key characteristic that needs to be front and center of any natural stone project. Absorption will determine two very important things: How prone the surface will be to staining and how to properly protect that surface.
- Characteristics of natural stone
The color, color intensity, color blend, grain size, structure, and texture of the rocks are significant characteristics. It’s crucial for the rock to resist weathering and deterioration as well as for the appearance and color of the stone surface to remain consistent throughout time.
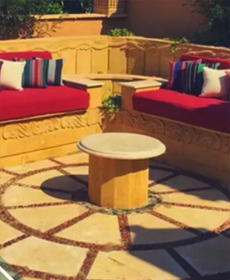
- Natural Stone Applications
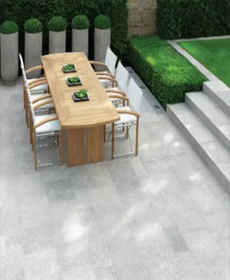
- Flooring tiles
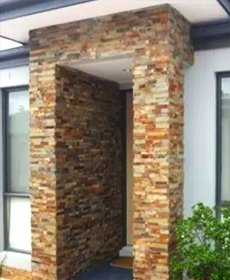
- Wall cladding
- Bathroom wall tiles
- Bathroom sink
- kitchen backsplash
- granite Kitchen countertops
- Tabletops and worktops
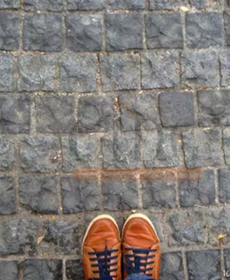
- Paving tiles
- Driveways
- Pool paving
- bullnose pool copping
- bullnose swimming pool coping
- marble Fountains
- Art and wall decorations
- Carvings
- Sculptures and monuments, etc.
- Advantages of natural stone
- Its powerful and stiff enough to handle heavy duty areas.
- It’s not slippery, so it’s good enough for heavy traffic.
- Contains an amazing botanical look that you can’t always achieve with different materials.
- It is easy to wave as it does not appeal to allergies or dust
- when added to the design, the value of the house increases.
- Because each stone is unique, it adds value and character to the design.
- Thereby offering an Adequate insulation, helps keep interior warm in winter and cool in summer.
- Offers a variety of shapes, sizes and finishes for a variety of options and applications.
- Edges:
Choosing the ideal edge profile for your particular taste and design style will optimize your design and add the finishing touch to your surface.
Edges profile available:
- Flat edge
- Half bevel edges
- Half bullnosed edge
- Demi bullnosed edge
- Full bullnosed edge
- 1\4 top – bottom round edge
- 1\4 top round edge
- Ogee edge
- Ogee bullnose edge
- Waterfall edge
- Dupont edge
- Cove edge
- Cove – ogee edge
- Arris edge
- Reverse edge
- 1\4 bevel edge
- Finishes:
- Polished: A high gloss, mirror-like surface is produced by grinding, sanding, and shining.
- Honed: The finish is produced by grinding and sanding, and it is not glossy. This works best in settings with heavy usage and little upkeep.
- Flamed: To create a flamed surface, expose the stone to a high-temperature torch flame, which burns the majority of the carbon content while leaving textured quartzites with a mild coloring, flamed granite paving slabs is popular product as example
- Sandblasted: By applying a high-pressure sand blast to the stone’s surface, a rough but neat appearance has been produced.
- Tumbled: A mixture of sand, water, and weak acid is used to tumble stones to give them an aged appearance.
- Split Face: This is accomplished by breaking stone, either manually or mechanically, to give the surface a natural quarry texture, which is primarily used for cladding. It gives the appearance of jutting bricks because of its uneven front surface and flat back.
- Stone veneer: Any stone used as decorative wall cladding that is not intended to support weight. Veneer can be produced with a variety of surface treatments, including split face, cleft, honed, polished, flamed, or tumbled.
- Brushed: A brushed finish particularly is obtained by applying pretty hard plastic or definitely metal brushes to the stone surface, to give a rough-raised and pretty smooth textured surface with a beautiful antiqued and weathered actually look that mostly is classic and timeless
- Bush hammered: Bush hammered is a technique where the surface of the stone mostly is hammered by a tool; and therefore, creates deep ridges giving it a fairly natural rough texture, with a rough, weathered look which basically is quite significant with non-slip feature.
- Acid wash: Acid wash is a particularly chemical treatment used through adding acid on the surface of the stone in a pretty major way to give a shiny antique look with small etches on the surface, showing less scratches.
- Available sizes:
- Cut to size
- Small opus pattern
- Large opus pattern
- Tiles
- Slabs
- Our factory can produce different sizes of tiles and different thicknesses as 1cm, 1.2cm, 1.5cm, 2cm, 3cm
- Common Marble Tiles sizes are: 30×60, 40×40, 40×60, 40×80,60×60, 60×90, 80×80, 90×90, 100x100cm